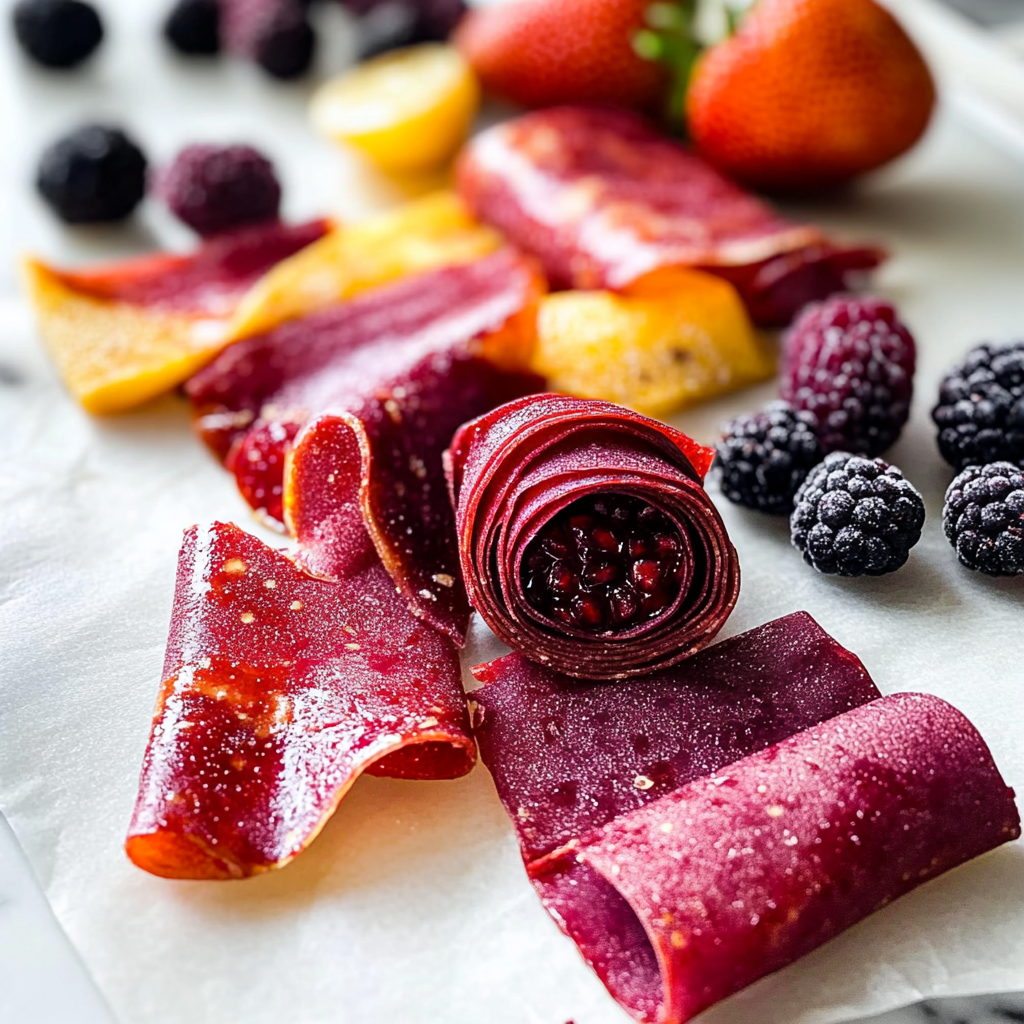
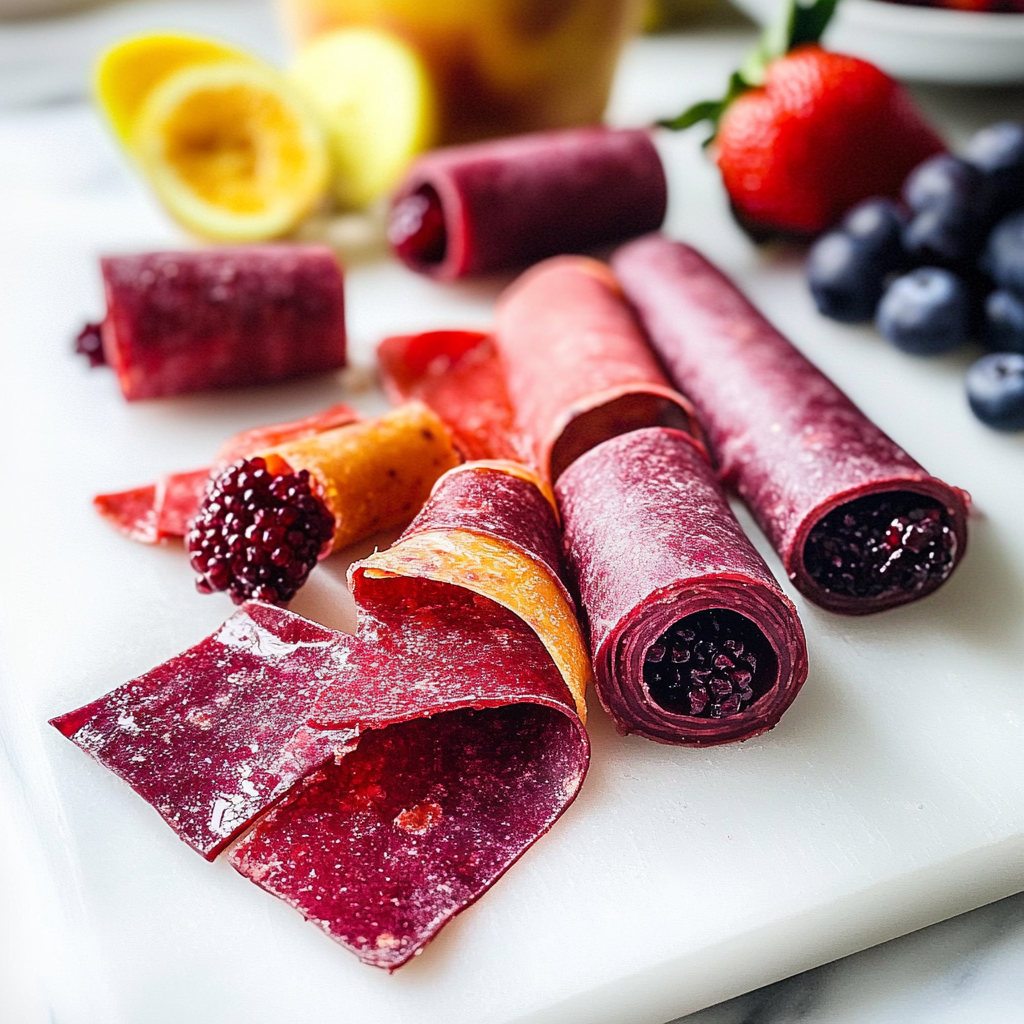
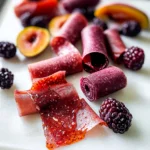
Homemade Fruit Roll-Ups are like sunshine wrapped in a chewy, fruity blanket. Imagine biting into a piece of candy that’s not only delicious but also packed with the goodness of real fruit. refreshing fruit smoothie The moment you tear open that colorful package, you’re greeted with the sweet, tangy aroma of your favorite fruits, ready to take you back to childhood snack time. bite-sized apple treats.

I remember the first time I made these beauties. My kids watched in awe as we transformed simple fruits into a delightfully chewy treat. It was like magic, and their faces lit up when they tasted the finished product. nutritious quinoa salad Perfect for school lunches or a weekend treat, Homemade Fruit Roll-Ups promise an explosion of flavor that will have everyone asking for seconds.
Why You'll Love This Recipe
- These Homemade Fruit Roll-Ups are incredibly easy to prepare and perfect for using up overripe fruit
- They burst with natural sweetness while being visually appealing and vibrant in color
- Versatile enough to mix and match your favorite fruits, they make for a fun family project
One sunny Saturday afternoon, my best friend brought her kids over for a playdate, and we decided to whip up some Homemade Fruit Roll-Ups together. The laughter echoed through the kitchen as we blended fruits and tried to sneak tastes along the way.
Essential Ingredients
Here’s what you’ll need to make this delicious dish:
-
Fresh Fruits: Choose ripe fruits like strawberries, bananas, or mangoes for the best flavor and sweetness. For more inspiration, check out this cheesecake deviled strawberries recipe.
-
Honey or Maple Syrup: Use natural sweeteners to enhance the fruit’s flavor without overpowering it. sweet focaccia with jam.
-
Lemon Juice: A splash of lemon juice brightens the flavor and helps preserve color.
-
Parchment Paper: You’ll need this for lining your baking sheets; it keeps everything non-stick.
The full ingredients list, including measurements, is provided in the recipe card directly below.
Let’s Make it Together
Prepare Your Fruits: Start by washing and chopping your chosen fruits into small pieces. This will help them blend more easily into a smooth puree.
Blend Until Smooth: Place the chopped fruits into a blender or food processor. Blend until completely smooth, adding honey or maple syrup and lemon juice during blending for added flavor.
Spread on Parchment Paper: Line a baking sheet with parchment paper and pour the fruit puree onto it. Spread evenly with a spatula until it’s about 1/8 inch thick.
Bake Low and Slow: Preheat your oven to 170°F (77°C) and bake the fruit puree for about 6-8 hours until it’s no longer sticky but still pliable. You’ll know it’s ready when it peels off easily from the parchment paper.
Cut & Enjoy!: Once cool, cut into strips or shapes using scissors or a pizza cutter. Roll them up tightly and store them in an airtight container for snacks later!
Making these Homemade Fruit Roll-Ups is not just about satisfying your sweet tooth; it’s about creating memories alongside delicious flavors! So gather your ingredients and let’s get rolling!
You Must Know
- Homemade Fruit Roll-Ups are a delightful treat, bursting with flavor and nostalgia
- They’re healthier than store-bought options and customizable to your taste
- The vibrant colors make them visually appealing, perfect for snacks or lunchboxes
- Plus, they’re super easy to make!
Perfecting the Cooking Process
Start by pureeing your fruit until smooth, then spread it evenly on a parchment-lined baking sheet. Bake at low heat—around 170°F—for about six hours to achieve the perfect chewy texture.
Add Your Touch
Feel free to mix different fruits for unique flavors. Try adding a splash of lemon juice or honey for sweetness. You could even toss in some spices like cinnamon or vanilla for extra depth.
Storing & Reheating
Once cooled, cut your roll-ups into strips and store them in an airtight container. They stay fresh at room temperature for up to two weeks, but refrigerating them can extend their shelf life.
Chef's Helpful Tips
- Use ripe fruits for the best flavor; they naturally sweeten your roll-ups without added sugar
- Avoid spreading too thickly; a thin layer ensures even drying and a better texture
- Experiment with combinations of fruits for deliciously unique flavors that everyone will love
Creating these roll-ups reminds me of the time I made them with my niece. She insisted on using every color of fruit possible, transforming our kitchen into a rainbow paradise!

FAQ
Can I use frozen fruit for homemade fruit roll-ups?
Yes, just thaw and drain excess moisture before pureeing.
How long do homemade fruit roll-ups last?
They can be stored at room temperature for up to two weeks.
Is it necessary to add sugar to my fruit roll-ups?
No, ripe fruits provide natural sweetness without needing extra sugar.
Homemade Fruit Roll-Ups
- Total Time: 6 hours 15 minutes
- Yield: About 12 servings (roll-ups) 1x
Description
Experience the joy of childhood with Homemade Fruit Roll-Ups! These chewy, fruity delights are made from real fruits, offering a deliciously sweet and tangy treat that’s perfect for snacks or school lunches. Easy to make and customizable, they turn overripe fruits into a vibrant and healthy snack that everyone will love.
Ingredients
- 2 cups fresh fruit (strawberries, bananas, or mangoes)
- 2 tablespoons honey or maple syrup
- 1 tablespoon lemon juice
- Parchment paper (for baking)
Instructions
- Preheat your oven to 170°F (77°C).
- Wash and chop the fresh fruit into small pieces.
- Blend the chopped fruit until smooth in a blender or food processor, adding honey or maple syrup and lemon juice while blending.
- Line a baking sheet with parchment paper and pour the fruit puree onto it. Spread it evenly to about 1/8 inch thick.
- Bake in the preheated oven for 6-8 hours until the fruit is no longer sticky but pliable.
- Once cool, cut into strips or shapes, roll them up tightly, and store in an airtight container.
- Prep Time: 15 minutes
- Cook Time: 6 hours
- Category: Snack
- Method: Baking
- Cuisine: American
Nutrition
- Serving Size: 1 serving
- Calories: 50
- Sugar: 10g
- Sodium: 0mg
- Fat: 0g
- Saturated Fat: 0g
- Unsaturated Fat: 0g
- Trans Fat: 0g
- Carbohydrates: 13g
- Fiber: 1g
- Protein: 0g
- Cholesterol: 0mg